Cable Band Hat
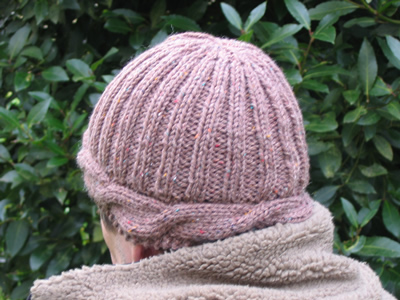
This 1970s style hat is constructed by knitting a cabled band and then picking up stitches to knit the rest of the hat - which in this example is ribbed. This version is is not intended to have a turned back brim; if you want one, then you must knit the rib section longer; you will not have to reverse any workings as the rib section is reversible, so could be worn either way out. The single layer construction is very economic on yarn; For my wool/acrylic blend, I used 58g.
InstructionsWith No. 5 (5½mm) needles cast on 11 stitches, and work in cable
pattern as follows: 1st row: (wrong side) K3, p6, k2. 9th - 14th rows: Repeat 1st and second rows 3 times. Repeat 1st - 14th rows 8 times more (9 patterns in all) ending with row 13. Graft the sts to the cast-on edge to form a circular band, [or cast off the 11 sts and sew the cast-on to the cast-off edge]. [Editor's note: If you want to alter the size (circumference) of your hat, now is the time to do it. Lengthen or shorten this band to the circumference you want to achieve. See "altering the size" below.] One edge of the band has a neat "finished" garter st edging
and the other has a reverse stocking stitch edge, which you will use to
continue knitting the hat in the round. Work in rounds of k2, p2 rib for 5 inches (about 28) rows. Shape Crown as follows: 1st round: *K2tog,
p2. Repeat from * to end of round. Repeat rounds 2 five times more. 8th round: *K1,
p2tog. Repeat from * to end of round. Break yarn, thread through remaining sts; draw up and fasten off securely. Making up: Changing the hat size, or substituting the wool.You may want to alter the size (circumference) of your hat, or compensate for a different gauge. This pattern relies on making an even number of cables around the hat, so to lengthen or shorten the band, you can either add in whole or partial pattern repeats, or, if you feel up to it, you could alter the number of rows in the pattern repeat of the cable. Test your gauge before you start and work out how many rows you need to make your chosen head circumference size. Start by dividing the number of rows you calculate by 14, and then try some other numbers, eg 12, 16, 13, or 15, until you are close to getting an exact number of patterns. [Note that if you choose to work to an uneven number of rows in the repeat, then you will end up doing your cable operations on purl rows, which is quite feasible, but approach with caution if your are a beginner in this field!] If the above all sounds hopeless to you, then just knit until the band is the length you require, and just sew the ends of the band together rather than trying to graft it. You could even work the hat on two needles instead of in the round, by picking up the stitches from the band before you sew it up, - and then, when you have finished, you sew a side seam into the hat, including the band. Finally if you are altering the size, or compensating for a different
gauge, you will probably need to pick up a different number of stitches
from the band. I usually pick up a number of stitches equal to three quarters
of the number of rows I have knitted. |
MaterialsExample shown is knitted in 2x 50g balls of vintage Richard Poppleton Emmerdale Chunky Tweed (an acrylic and wool blend). Two size 5 (5½mm) needles and a size 6 (5mm) circular needle - short
length suitable for a hat. TensionApprox. 9st to 2 inches on No 6 needles. Size mattersThis hat worked out to about 22 inches head circumference. My estimate
is that "to fit an average sized head" means 22/23 inches for
a man's size and 20-22 inches for a woman's size. A word on the wool.Original pattern called for Patons Double plus, which was a double knitting
wool, and the instructions were to knit the yarn double, producing a tension
of 7.5sts and 10 rows to 2 inches. Disclaimer
|
